It’s a general rule of the internet that, whenever you have a cool idea, a few minutes spent on your favourite search engine reveals that someone else has had the idea before you. In my case, when I first saw the functionality in Power Query for working with binary files I wondered whether it was possible to read the contents of a file containing an image and render each pixel as a cell in a worksheet – and of course, it has already been done and done better than I could ever manage. However, it hasn’t been done in Power Query… until now.
First of all, I have to acknowledge the help of Matt Masson whose blog post on working with binary data in Power Query provided a number of useful examples. I also found this article on the bmp file format invaluable.
Second, what I’ve done only works with monochrome bmp files. I could have spent a few more hours coming up with the code to work with other file types but, frankly, I’m too lazy. I have to do real work too, you know.
So let’s see how this works. Here’s a picture of Fountains Abbey that I took on my phone while on holiday last summer:

I opened it in Paint and saved it as a monochrome bmp file:

Here’s the code for the Power Query query that opens the bmp file and renders the contents in Excel:
[sourcecode language=”text” padlinenumbers=”true” light=”false”]
let
//The picture to load
SourceFilePath="C:\Users\Chris\Pictures\FountainsAbbey.bmp",
//Or get the path from the output of a query called FileName
//SourceFilePath=FileName,
//Load the picture
SourceFile=File.Contents(SourceFilePath),
//First divide the file contents into two chunks:
//the header of the file, always 62 bytes
//and the rest, which contains the pixels
//Define the format as a record
OverallFormat=BinaryFormat.Record([
Header = BinaryFormat.Binary(62),
Pixels = BinaryFormat.Binary()
]),
//Load the data into that format
Overall = OverallFormat(SourceFile),
//Get the header data
HeaderData = Overall[Header],
//Extract the total file size and
//width and height of the image
HeaderFormat = BinaryFormat.Record([
Junk1 = BinaryFormat.Binary(2),
FileSize = BinaryFormat.ByteOrder(
BinaryFormat.SignedInteger32,
ByteOrder.LittleEndian),
Junk2 = BinaryFormat.Binary(12),
Width = BinaryFormat.ByteOrder(
BinaryFormat.SignedInteger32,
ByteOrder.LittleEndian),
Height = BinaryFormat.ByteOrder(
BinaryFormat.SignedInteger32,
ByteOrder.LittleEndian),
Junk3 = BinaryFormat.Binary()
]),
HeaderValues = HeaderFormat(HeaderData),
FileSize = HeaderValues[FileSize],
ImageWidth = HeaderValues[Width],
ImageHeight = HeaderValues[Height],
//Each pixel is represented as a bit
//And each line is made up of groups of four bytes
BytesPerLine = Number.RoundUp(ImageWidth/32)*4,
//Read the pixel data into a list
PixelListFormat = BinaryFormat.List(
BinaryFormat.ByteOrder(
BinaryFormat.Binary(BytesPerLine),
ByteOrder.LittleEndian)),
PixelList = PixelListFormat(Overall[Pixels]),
//Convert each byte to a number
PixelListNumbers = List.Transform(PixelList, each Binary.ToList(_)),
//A function to convert a number into binary
//and return a list containing the bits
GetBinaryNumber = (ValueToConvert as number) as list =>
let
BitList = List.Generate(
()=>[Counter=1, Value=ValueToConvert],
each [Counter]<9,
each [Counter=[Counter]+1,
Value=Number.IntegerDivide([Value],2)],
each Number.Mod([Value],2)),
BitListReversed = List.Reverse(BitList)
in
BitListReversed,
//A function to get all the bits for a single line
//in the image
GetAllBitsOnLine = (NumberList as list) =>
List.FirstN(
List.Combine(
List.Transform(NumberList, each GetBinaryNumber(_)
)
), ImageWidth),
//Reverse the list – the file contains the pixels
//from the bottom up
PixelBits = List.Reverse(
List.Transform(PixelListNumbers,
each GetAllBitsOnLine(_))),
//Output all the pixels in a table
OutputTable = #table(null, PixelBits)
in
OutputTable
[/sourcecode]
The output of this query is a table containing ones and zeroes and this must be loaded to the worksheet. The final thing to do is to make the table look like a photo by:
- Hiding the column headers on the table
- Using the ‘None’ table style so that there is no formatting on the table itself
- Hiding the values in the table by using the ;;; format (see here for more details)
- Zooming out as far as you can on the worksheet
- Resizing the row heights and column widths so the image doesn’t look too squashed
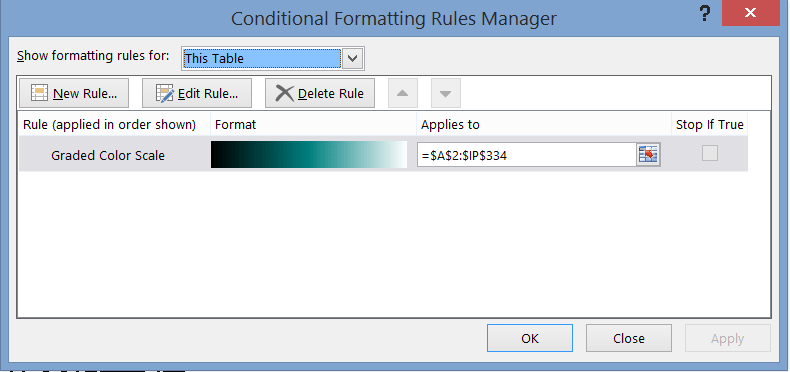
- Using Excel conditional formatting to make the cells containing 0 black and the cells containing 1 white:

Here’s the photo rendered as cells in the workbook:

And here it is again, zoomed in a bit so you can see the individual cells a bit better:

You can download the workbook (which I’ve modified so you can enter the filename of your bmp file in a cell in the worksheet, so you don’t have to edit the query – but you will have to turn Fast Combine on as a result) from here. Have fun!


So this is what Excel should be used for.
Chris, this is anything but lazy! That’s pretty amazing.
Hey, when testing your excel, i got an error when refreshing the powerquery : Formula.Firewall: Query ‘ReadMonoBMP’ (step ‘Overall’) references other queries or steps and so may not directly access a data source. Please rebuild this data combination ….
a google search brought me to this (where you were also involved…) https://social.msdn.microsoft.com/Forums/en-US/69153a6d-2205-4456-bcac-3a4689c787cf/parameterising-queries?forum=dataexplorer
So I changed to ‘Fast Combine – Ignore…’ and then it worked fine.
Thanks Kurt, I forgot to mention that you have to turn Fast Combine on in the post. I’ll update it now…
@Chris,
Great work with PQ. This was however done long ago by an Excel Genius Ivan F who unfortunately did not get recognition that he deserved from Microsoft – Thanks to to wayback machine – And we are able to still see a large chuck of his work
Check out
http://web.archive.org/web/20120104180949/http://xcelfiles.homestead.com/ImageToXL.html